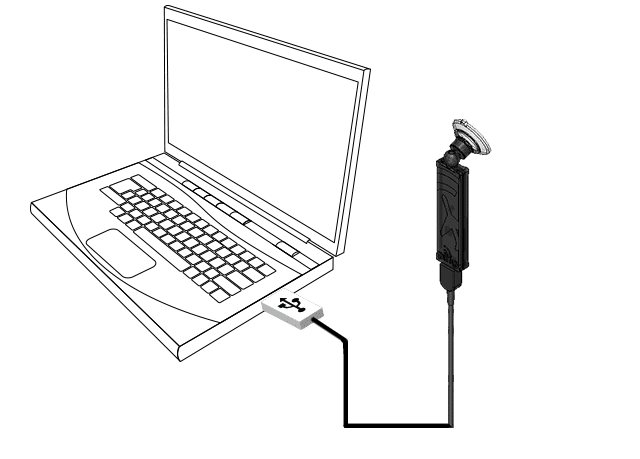
1. Connect Ping USB to a Windows PC.
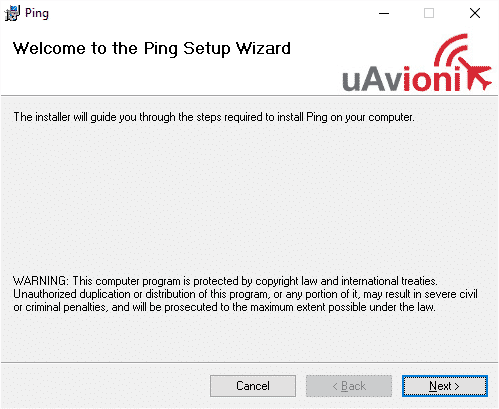
2. Download the ping installer.
https://uavionix.com/downloads/pingusb/Software/PingUSB_v_1_0_6.zip
3. Extract (unzip) the pingUSB installation software.
4. Run the pingSetup.msi and follow the on-screen setup.
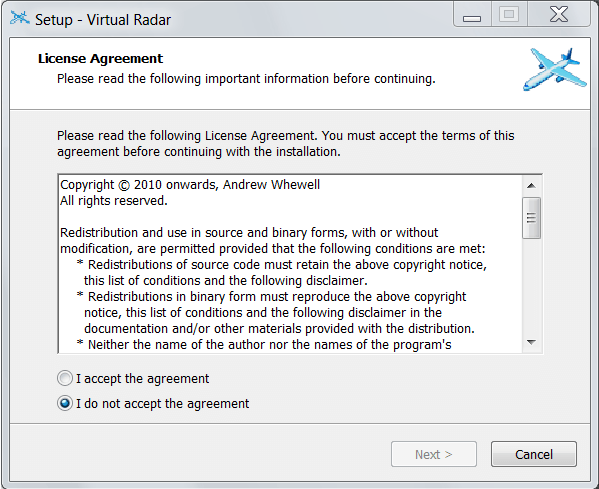
5. Download Virtual Radar Server for Windows.
http://www.virtualradarserver.co.uk/Download.aspx
6. Run VirtualRadarSetup.exe and complete installation of Virtual Radar Server.
7. Launch/Run Virtual Radar Server
8. Select Tools > Options >Receivers and click the plus sign to add a receiver.
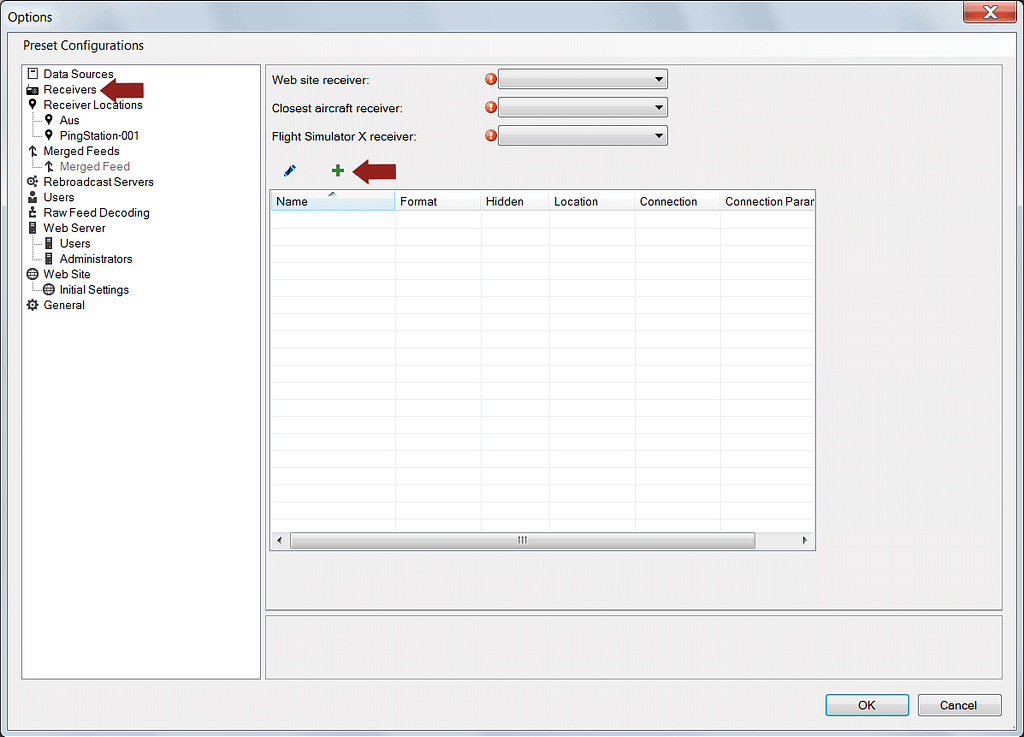
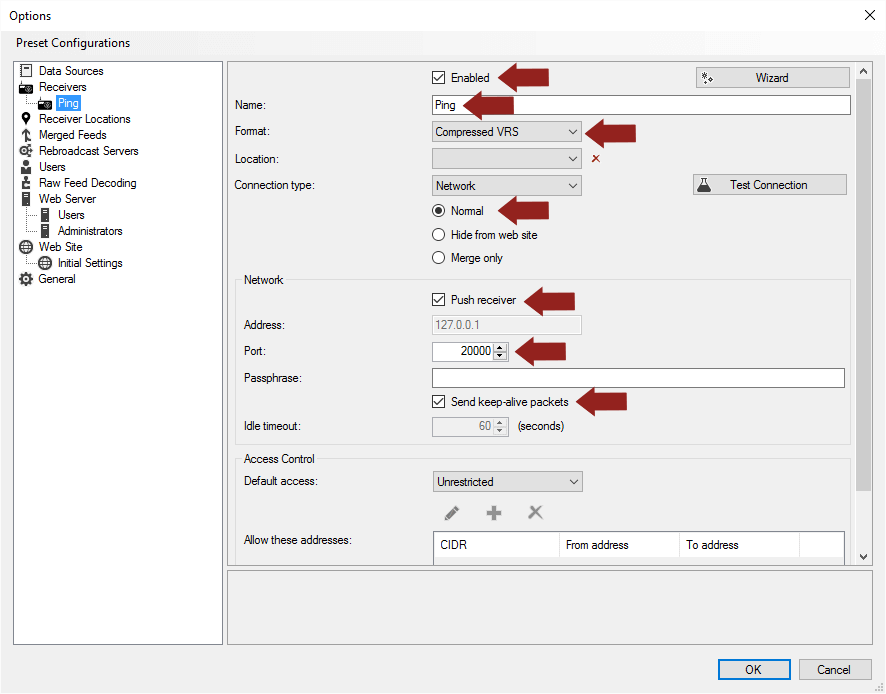
9. Complete the Add Receiver dialog as shown below.
- Check the box next to Enabled
- Enter a name for the receiver i.e. pingUSB
- Set the Format to Compressed VRS
- Connection Type Network
- Choose Normal
- Check the Push Receiver box
- Enter a port value and note this port value for later use. The default of 20000 works well for most installations.
- Check the box next to Send keep-alive packets
- Verify the above settings and click OK
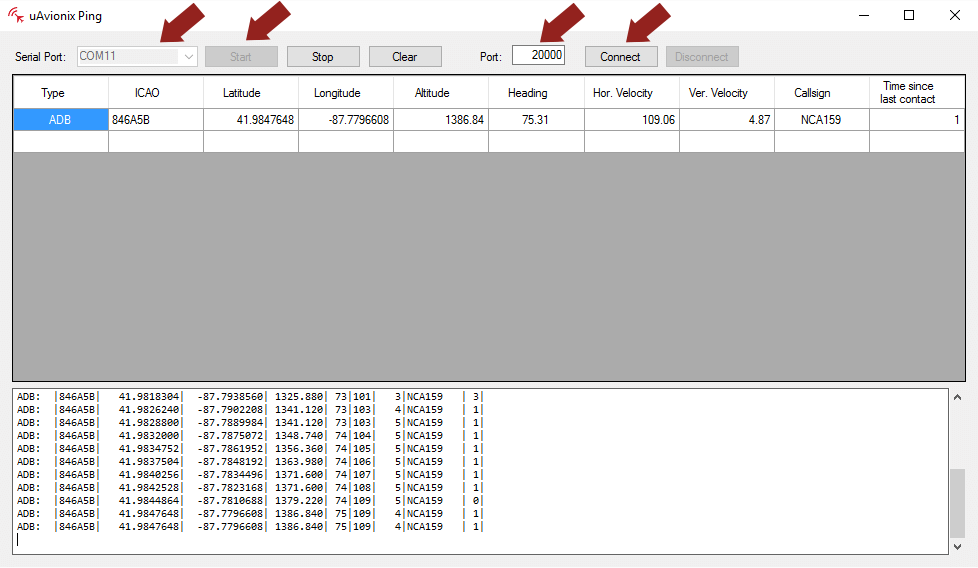
10. Launch the Ping application and configure as follows:
- Select the appropriate COM port for pingUSB.
- Click Start
- Verify the port value matched the port you selected when setting up the receiver in Virtual Radar Server.
- Click Connect
Note: Traffic messages as received will appear in the ping application when aircraft are in range. These messages are then passed to Virtual Radar Server.
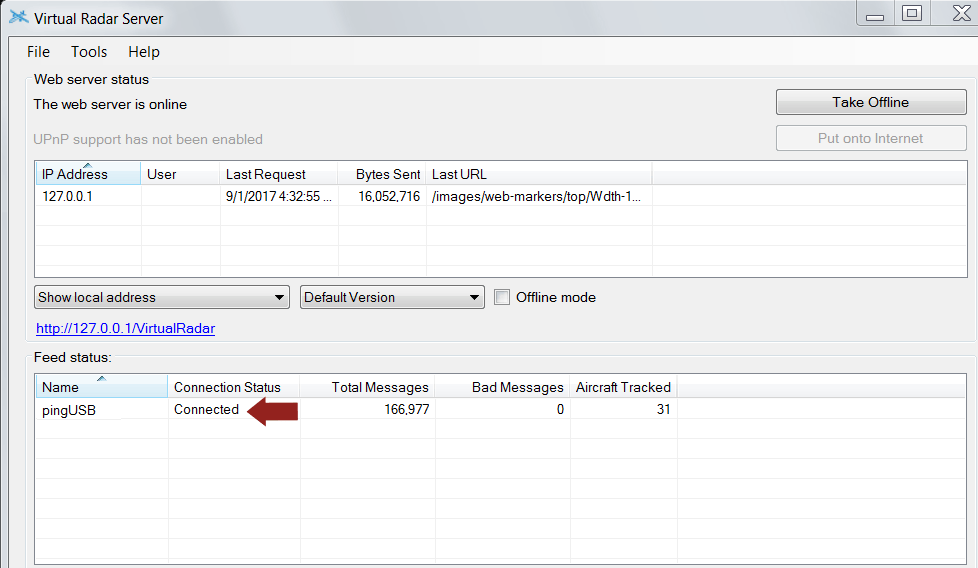
11. Return to Virtual Radar Server and verify messages are being received from the pingUSB.
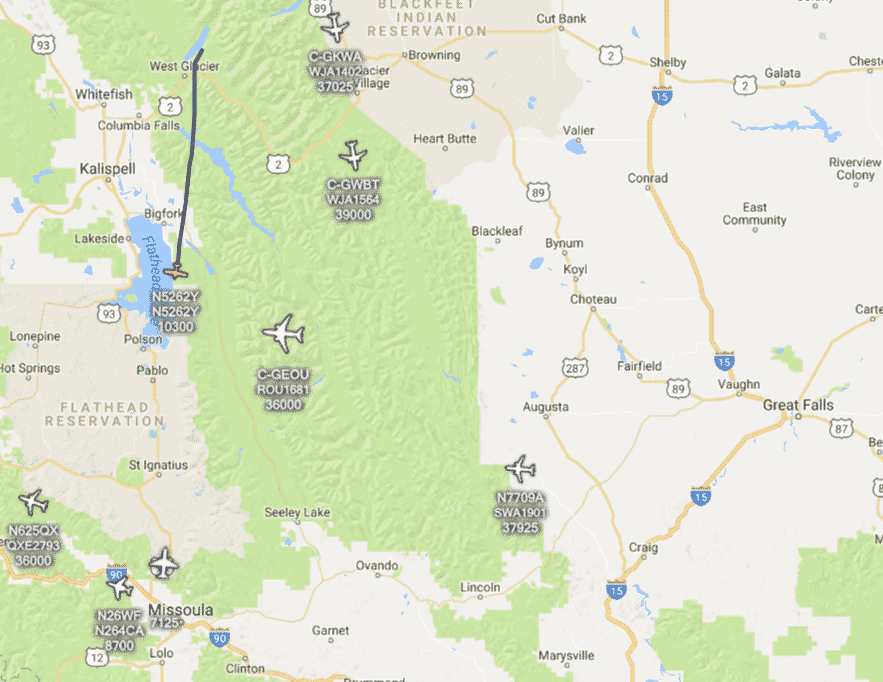
12. To view the traffic on the map in Virtual Radar Server click the link to launch the local web page.

Documentation for Virtual Radar Server can be found at: http://www.virtualradarserver.co.uk/Documentation/Default.aspx
Support for pingUSB is provided by uAvionix: https://uavionix.com/support/