Note this process is only applicable to specific units, there is no need to perform these steps unless directed by uAvionix.
To update the pingEFB PID/VID perform the following steps:
For Windows Users:
1. Download FT Prog http://www.ftdichip.com/Support/Utilities.htm#FT_PROG
2. Install FT Prog by launching the downloaded installer.
3. Download the pingEFB Template here: https://uavionix.com/downloads/pingefb/PingEFB-FTDI.xml (Right Click Save As)
4. Connect pingEFB to your PC using a USB cable.
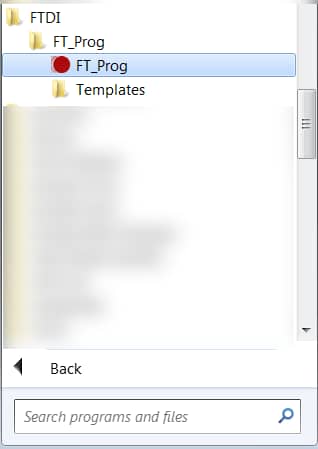
5. Launch FT Prog by locating it in the Start Menu under FTDI or by searching for the application FT_Prog.
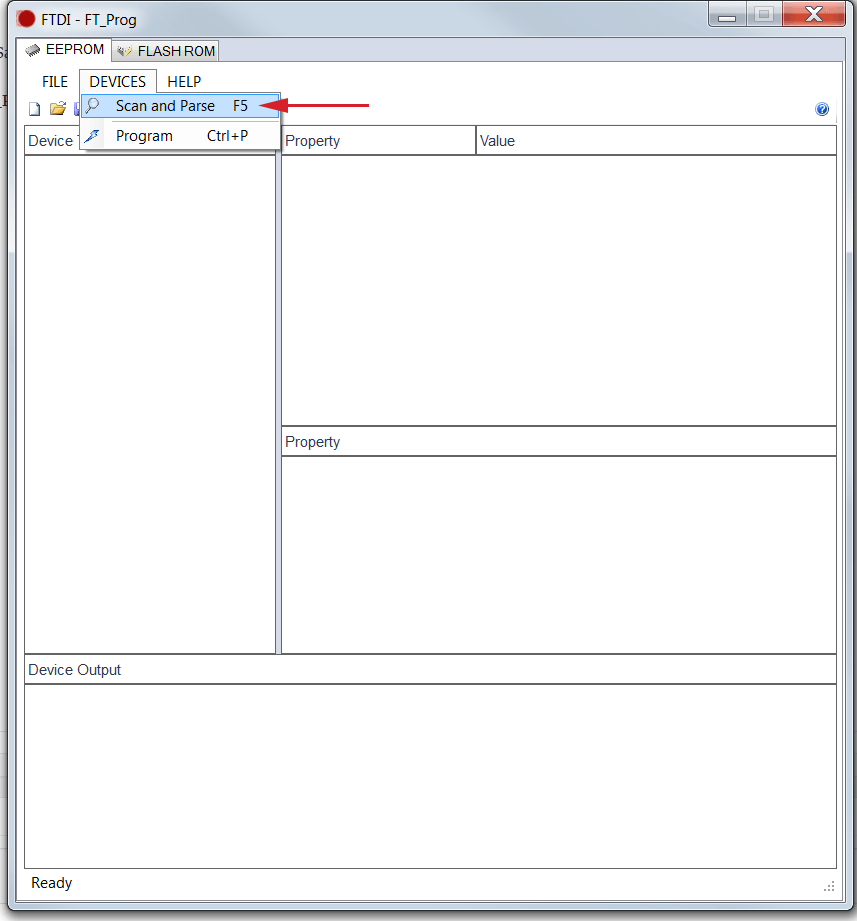
6. Once FT Prog is Open, Click on Devices and then Click on Scan and Parse
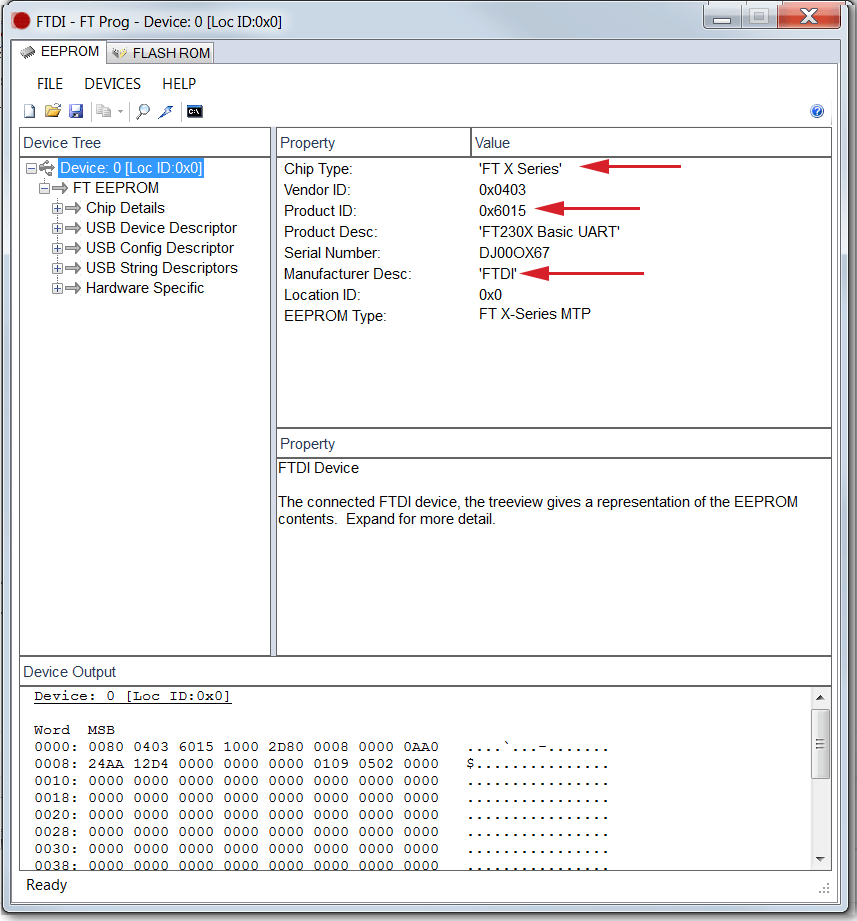
7. The pingEFB device should populate in the left hand column. You should see the following entries FT X Series, Product ID: 0x6015, Product Description FT230X Basic UART.
The following steps should only be completed on this device entry. If you have any questions contact us via support.
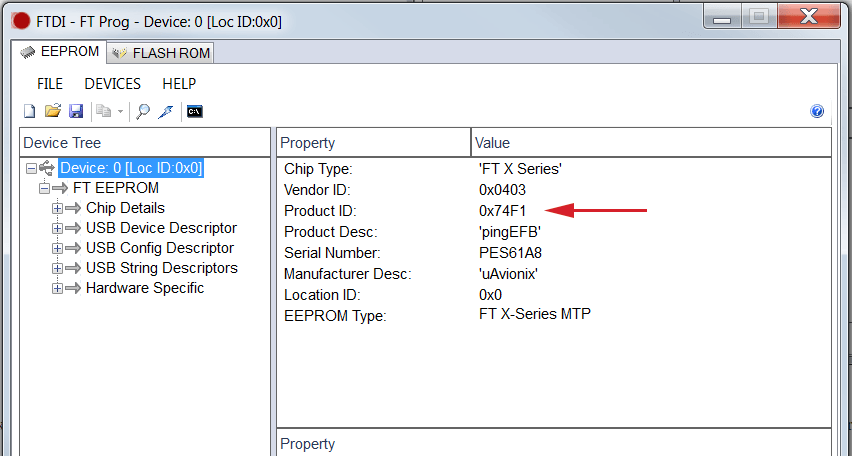
If the Product ID is 0x74F1 and the Product Desc. is PingEFB your device is configured correctly and no further action is necessary.
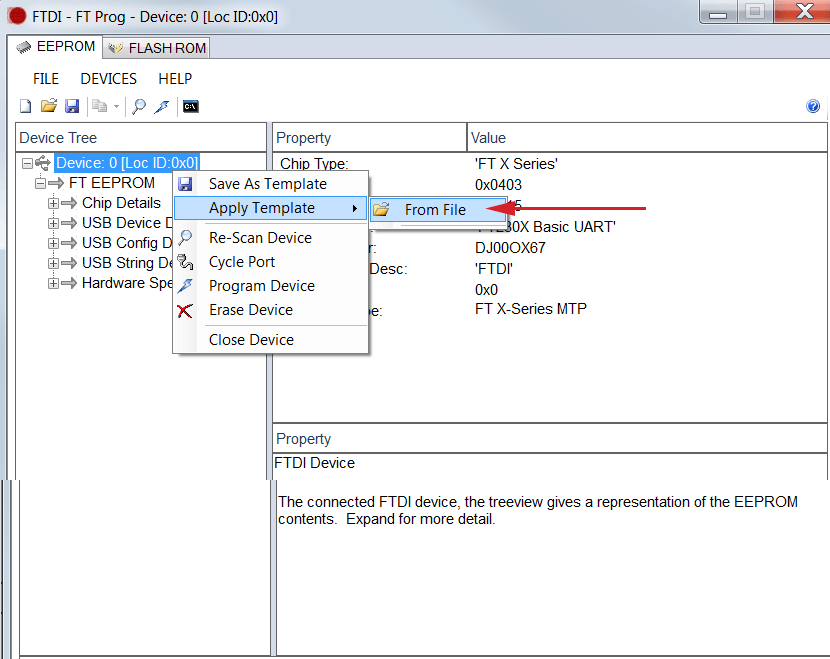
8. Right click on the Device that displays the Product ID 0x6015 as shown above and choose Apply Template > From File
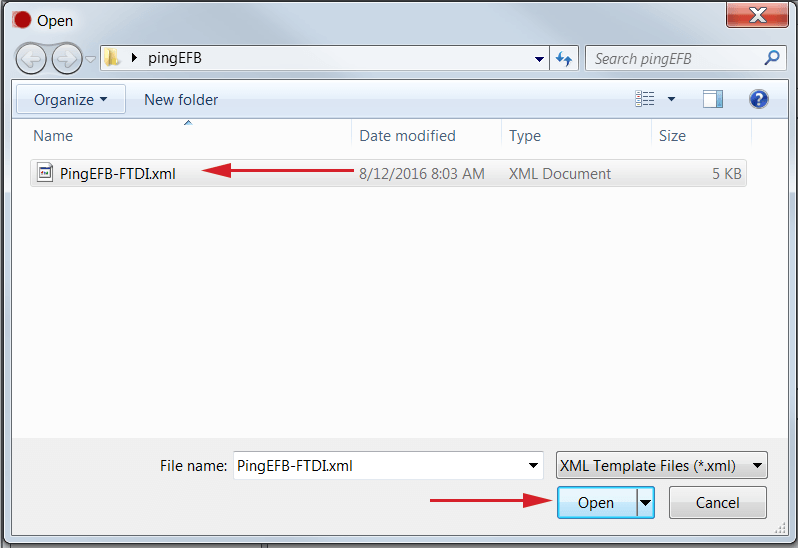
9. Browse to the .XML file downloaded in step 3, select the file and click Open
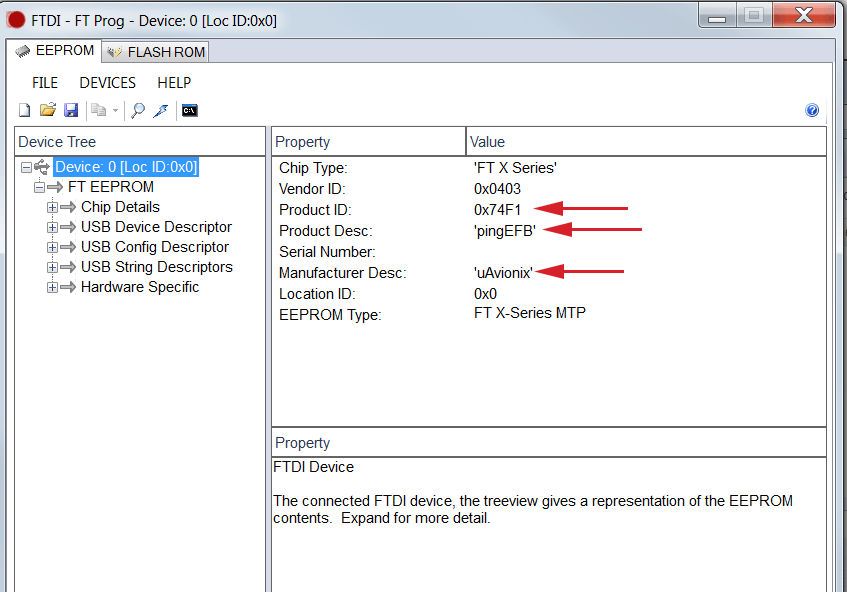
10. Verify the Vendor ID, Product ID and Manufacturer Desc. Match the entries below.
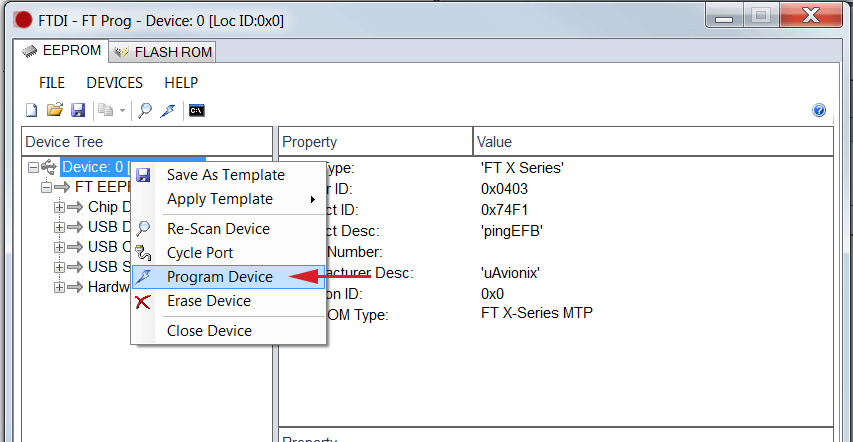
11. After verification right click the Device entry and choose Program Device
12. After programming the message Write Successful will appear briefly at the bottom left corner of the window.
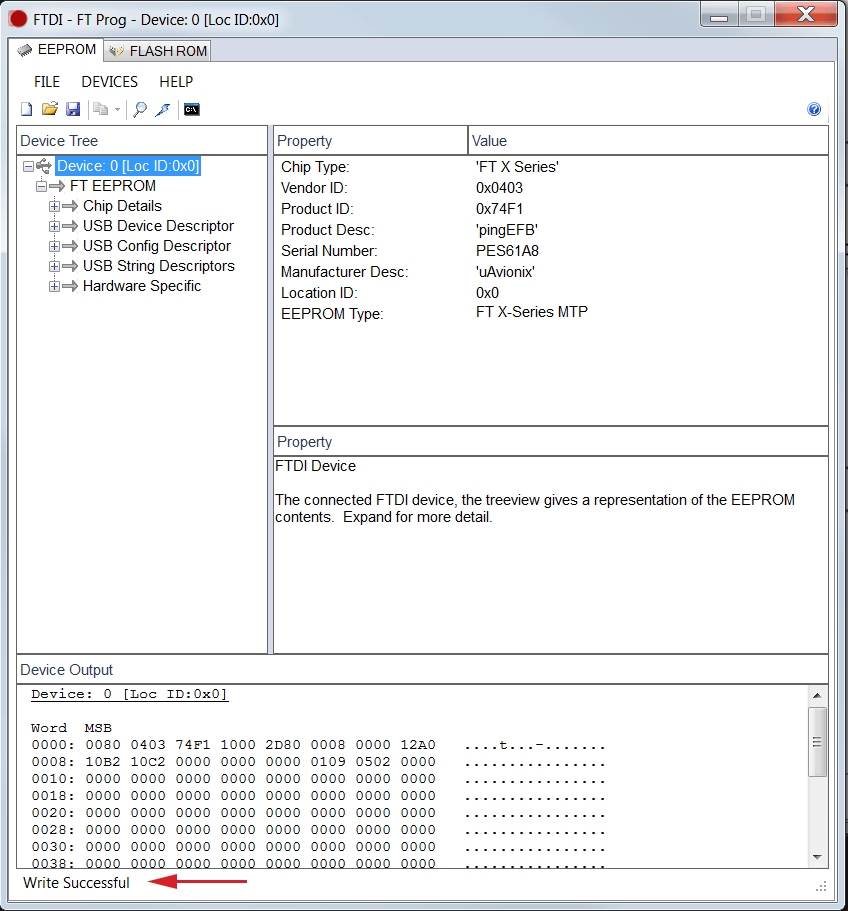
13. As a final step click on Devices and then click on Scan and Parse. The device listing should update. Verify that the device now has a Product ID of 0x74F1.
14. You may now disconnect the device and attach it to your Raspberry Pi running Stratux. A power cycle is recommended.

